Hello! Let me introduce myself. My name is Kris and I am the founder and lead organizer for Krisp Solutions.
I often get asked by my clients “Is this the WORST room (kitchen, garage, attic…. you fill in!) that you have EVER seen?” My answer is always the same resounding…”NO!” Everyone has clutter. And everyone’s house has different clutter. There is no perfectly organized house. And there is not just one way to be organized. Organization is really all about processes. Processes that entail making decisions about what to do with your possessions (do I keep? toss?, donate?, store away?) ….and THAT decision will be different for everyone. My job as an organizer is to help people make those decisions…and move forward!
My thought is that “Organization” is not a destination….it is a journey! As an experienced organizer both personally and professionally…. I would like to share with you in these blogs how to make this journey. I will provide practical tips for you to use to get organized. Of course, you can always me hire to do it.😄 …but I do hope that you can learn from my tips…and then you can maybe find a way to do it yourself! I hope that I can inspire you to give it a try!
If you have some specific problem areas that you would like to me to discuss…. please let me know.
For now, I am going to start at the beginning of the alphabet with A.
A is for Attic….and I’ll bet yours needs some organizing!
See you each month as we take an organizing journey…
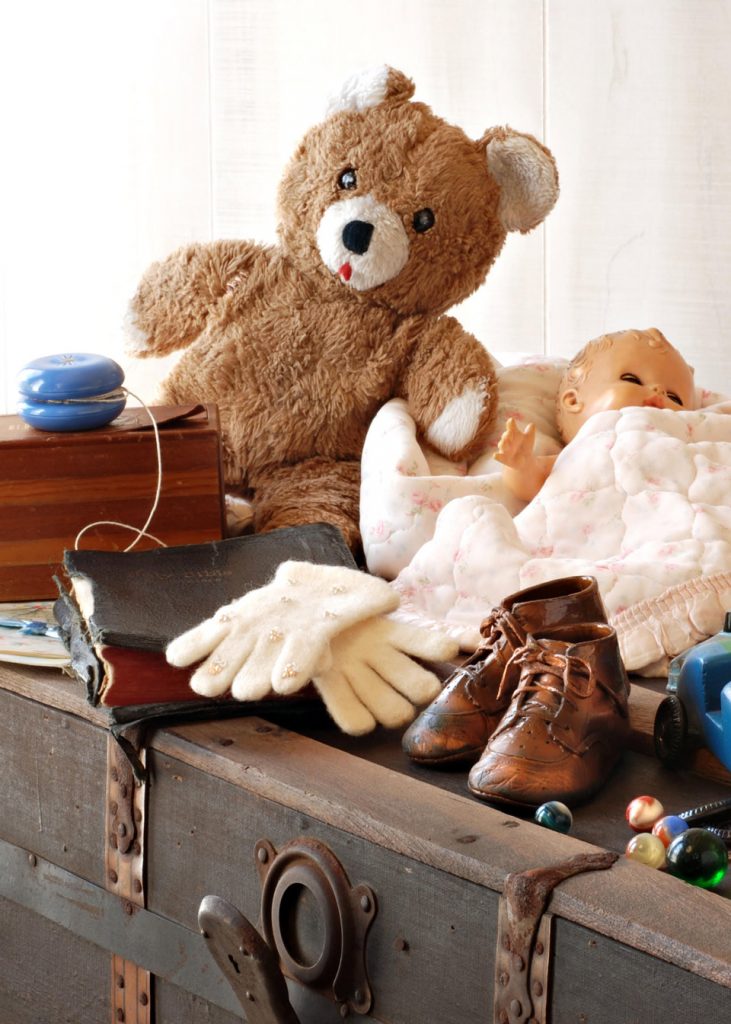
I recommend to clients that they give each family member their storage container in which to keep their memorabilia. When my brothers and sisters were little, my mom gave each of us a classic steamer trunk with our names painted on the outside. Nowadays, an extra-large plastic bin will work just as well (and might be preferable if it is going to be kept in a basement or garage). Parents may want to put mementos in it when the children are little (favorite artwork, a stuffed animal, pictures, report cards). But as they get older the grown child should be the one to decide what goes in it (awards, yearbooks, photo albums). The plan could be that the trunk will go with the child when he or she finally moves away from home. But it is also possible that child as an adult will finally take it away when their parents reach a downsizing age. The point is that each person has a reserved space AND a limitation to their space. The rule is to keep it to the ONE trunk per person which means that there may needs to be some sorting and purging through the years.
Attic DIY Process:
It’s almost summer and if you have not cleaned out your attic this year…you may be running out of time before it becomes too hot to go up there to do it! No matter what climate you live in, you are very fortunate if you have an attic in which to stash things! It makes excellent out-of-sight storage. But it can also easily become the place for anything that you can’t decide what will be its next purpose. It is easy to just banish it to the attic…and the decision gets put off for another day!
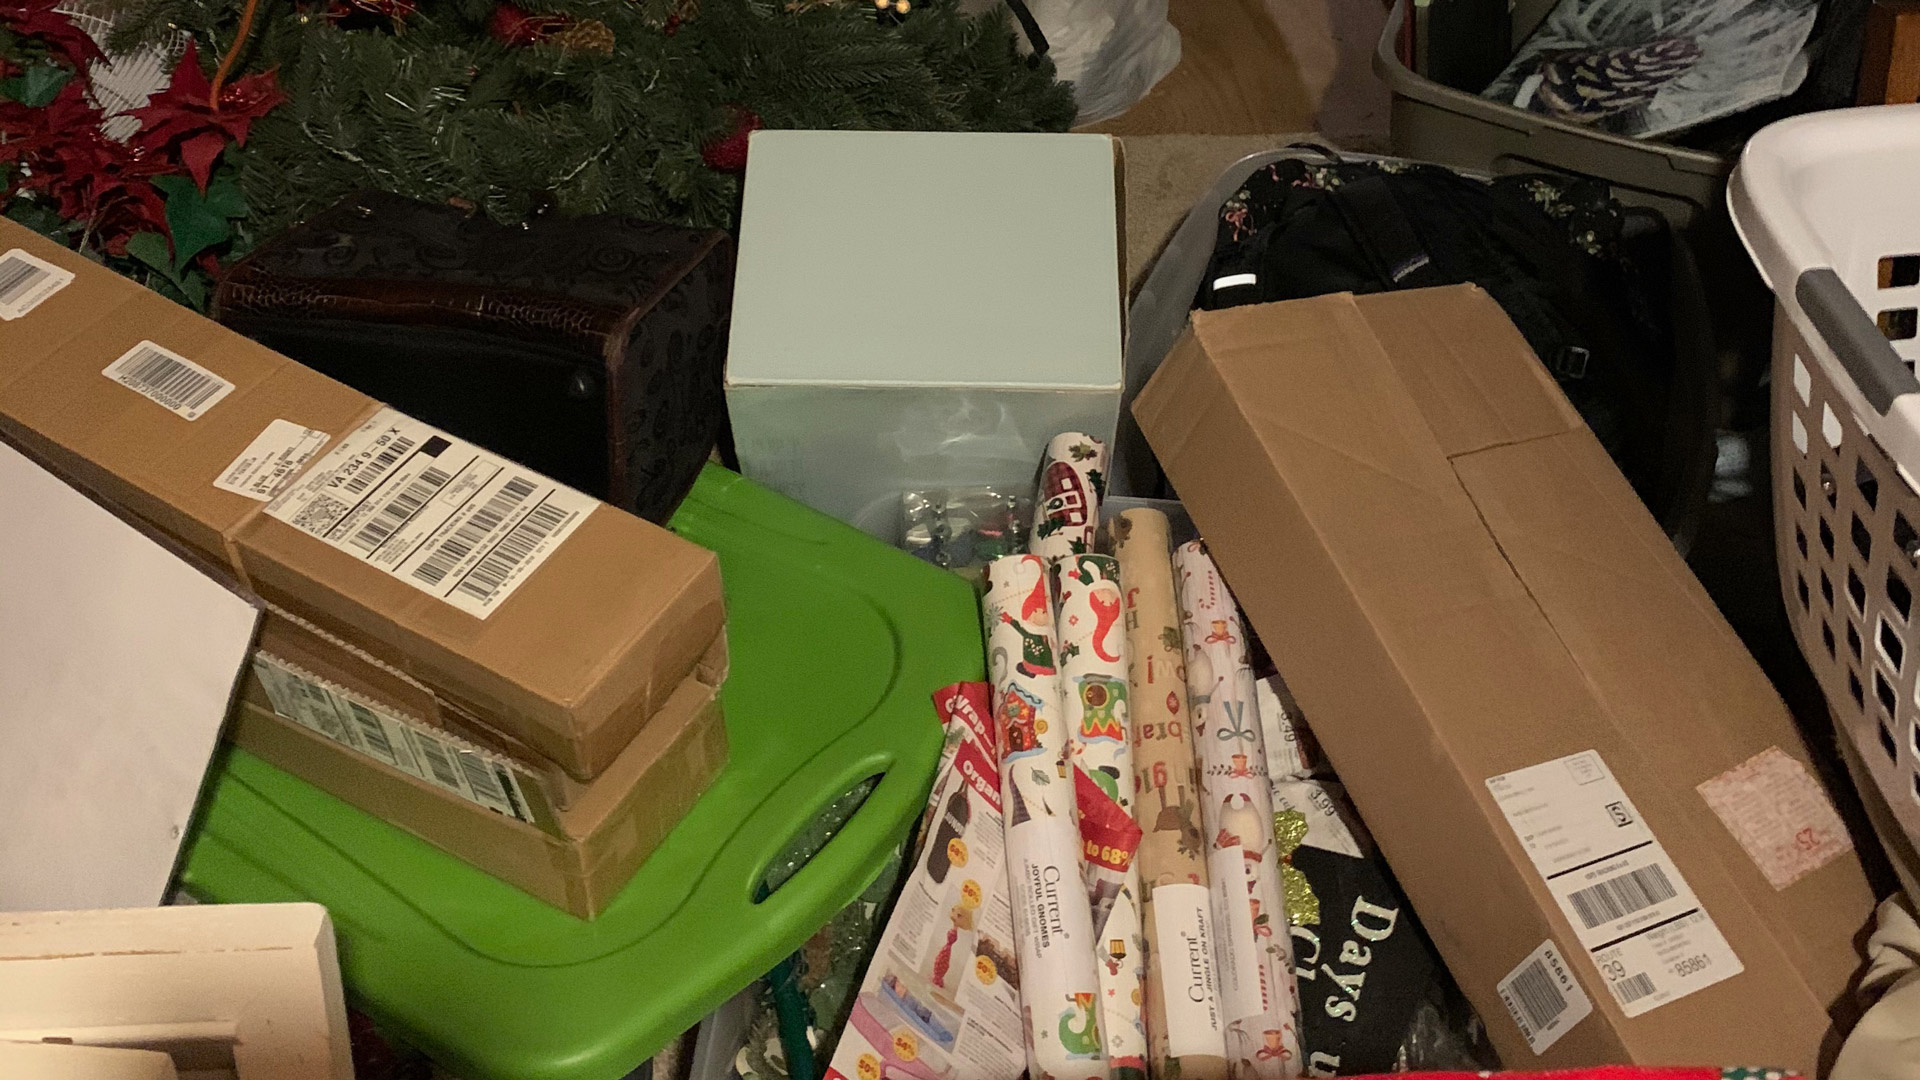
As you can tell from the before pic, when I started this attic project, we couldn’t even get INTO the attic because it was so packed. In the search for the Christmas nativity…. birthday wrapping paper…. last year’s sports equipment…. a favorite lamp…. kids’ books to donate…. each person who entered the attic rummaged through bins or boxes. With no rules to follow…or follow up… it was several feet deep with STUFF.
So where to start on organizing an attic? Well, organizing follows the same process for every room in the house.
Step #1: “The Sort”. Categories were agreed upon to group items. These were then written down on notebook paper and taped to the ceiling in intervals apart. In this family the categories were “Christmas”, “Personal”, “Other Holidays”, “Household”, “Donate”. Yours may be totally different…it is what works in your space. Then the items were sorted…and moved around…and sorted…and moved around. While that was being done, the empty bins were collected. Any without lids were set aside. (If at the end, the lids do not show up…the bins are repurposed (for extra boots in the garage?) or discarded. Bins are relatively inexpensive to replace.
Step #2: Decision Time. Someone or all of the family needs to be present to help make decisions to toss, donate or sell. Each of the family members (this household had 4 young adults ages 15-22) was individually called by the mom to come up to the attic… and decide what to do with their things. We had piles of items to toss, donate or keep. The toss and donate were immediately moved out to make room.
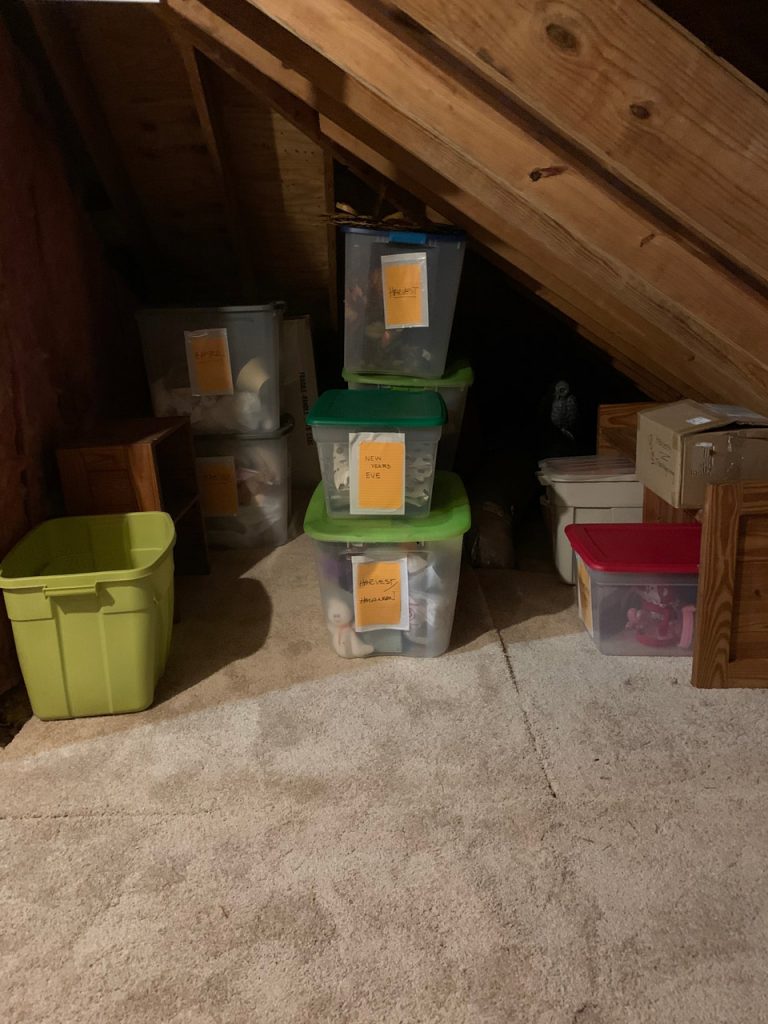
Step #3: Store It. This step means putting the items you plan to keep into some kind of storage container. This could be plastic bins, cardboard boxes or any storage method that works for you. Baskets, tubs, or shelves might be other options although in an attic something with a lid is preferable.
Step #4: Label it. This is the fun part and most creative. I will do a blog later on labeling, but the ideas are limitless. I also recommend an inventory list attached on the outside of each container. The list can be as high level (such as non-Christmas decorations) or detailed (July 4th flags, Easter baskets, Halloween lanterns.) I prefer more detail on the list as that avoids someone later dumping out bins looking for one item!
Note: There is one more potential step… but only if needed. I recommend that “Rules of the ATTIC” be created and left pinned to the attic door or a beam as a reminder. “Put everything BACK in its place!” is the primary one. 😉
RECAP of KrispTips:
Plan how to start the organization (categories, storage method)
Have the family involved in decisions of disposal
Every person should have a trunk/storage bin/shelf to keep things in/on
Label everything when done
Make attic rules to ensure everything stays put away
Getting Help with Attics
If it seems too overwhelming to organize your attic…. please reach out to us. If you have some questions, I am happy to help you get your DIY kicked off….at no charge! And if you still need more help, we can discuss if a Krisp Solutions project would work for you. Another option is that during Covid 19 restrictions we can do virtual consulting over Zoom or Facetime. Contact us and let’s see what help or inspiration you need!
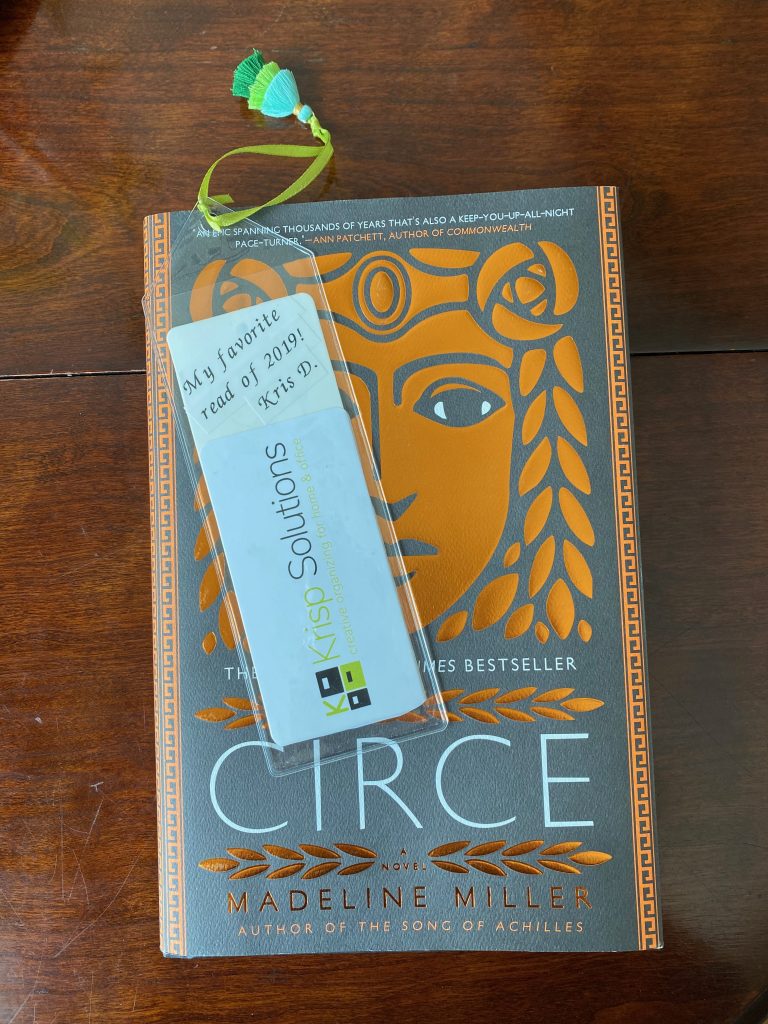
When guests come to visit they will love your special hospitality touch that you share with them your favorite reading recommendations! I put out some of my favorite books on the guest room night table… and in them is a homemade bookmark with a note to my guests. “This was my favorite read this year”, “Best Nonfiction ever!” “Good beach read – a mix of romantic and comedy” or even “Best book from my childhood”! Leave a variety of book selections out for them…and you are sure to please everyone! (I have Happiness is a Warm Blanket outin my guest room😊) It is such a personal touch and I promise it will touch them!
Books DIY Process:
I must admit that I have gone to reading most of my fun books (mysteries, urban fantasy) on my Kindle. That said I think it makes me prize my hardcover books even more. Maybe it is “old school” but I still love to peruse book covers on a stroll through Barnes and Noble. I am pretty sure that I am not the only out there that loves to hold a real book. I like to read on the jacket the author’s bio and a summary of the possibilities inside. I still keep many of my favorite books going back to childhood (my earliest favorite is still The Secret Garden!) through school (Shakespeare, Dickens) and then on to the business gurus in graduate school (Carnegie, Covey, Peters). Now I have tons of professional books (How-to-books mostly with some inspirational ones).
And on top of coveting all those books, I have recently decided to tackle one of my bucket-list items – to read the Great Books! Yowzer! I am finding it very hard to keep up with some brilliant scholars that are in the Great Books conversation group. There is a continuous email debate going on amongst them about philosophy versus economy. (I may be in over my head! But I will DO this!)
To organize your books, it’s my same organization process:
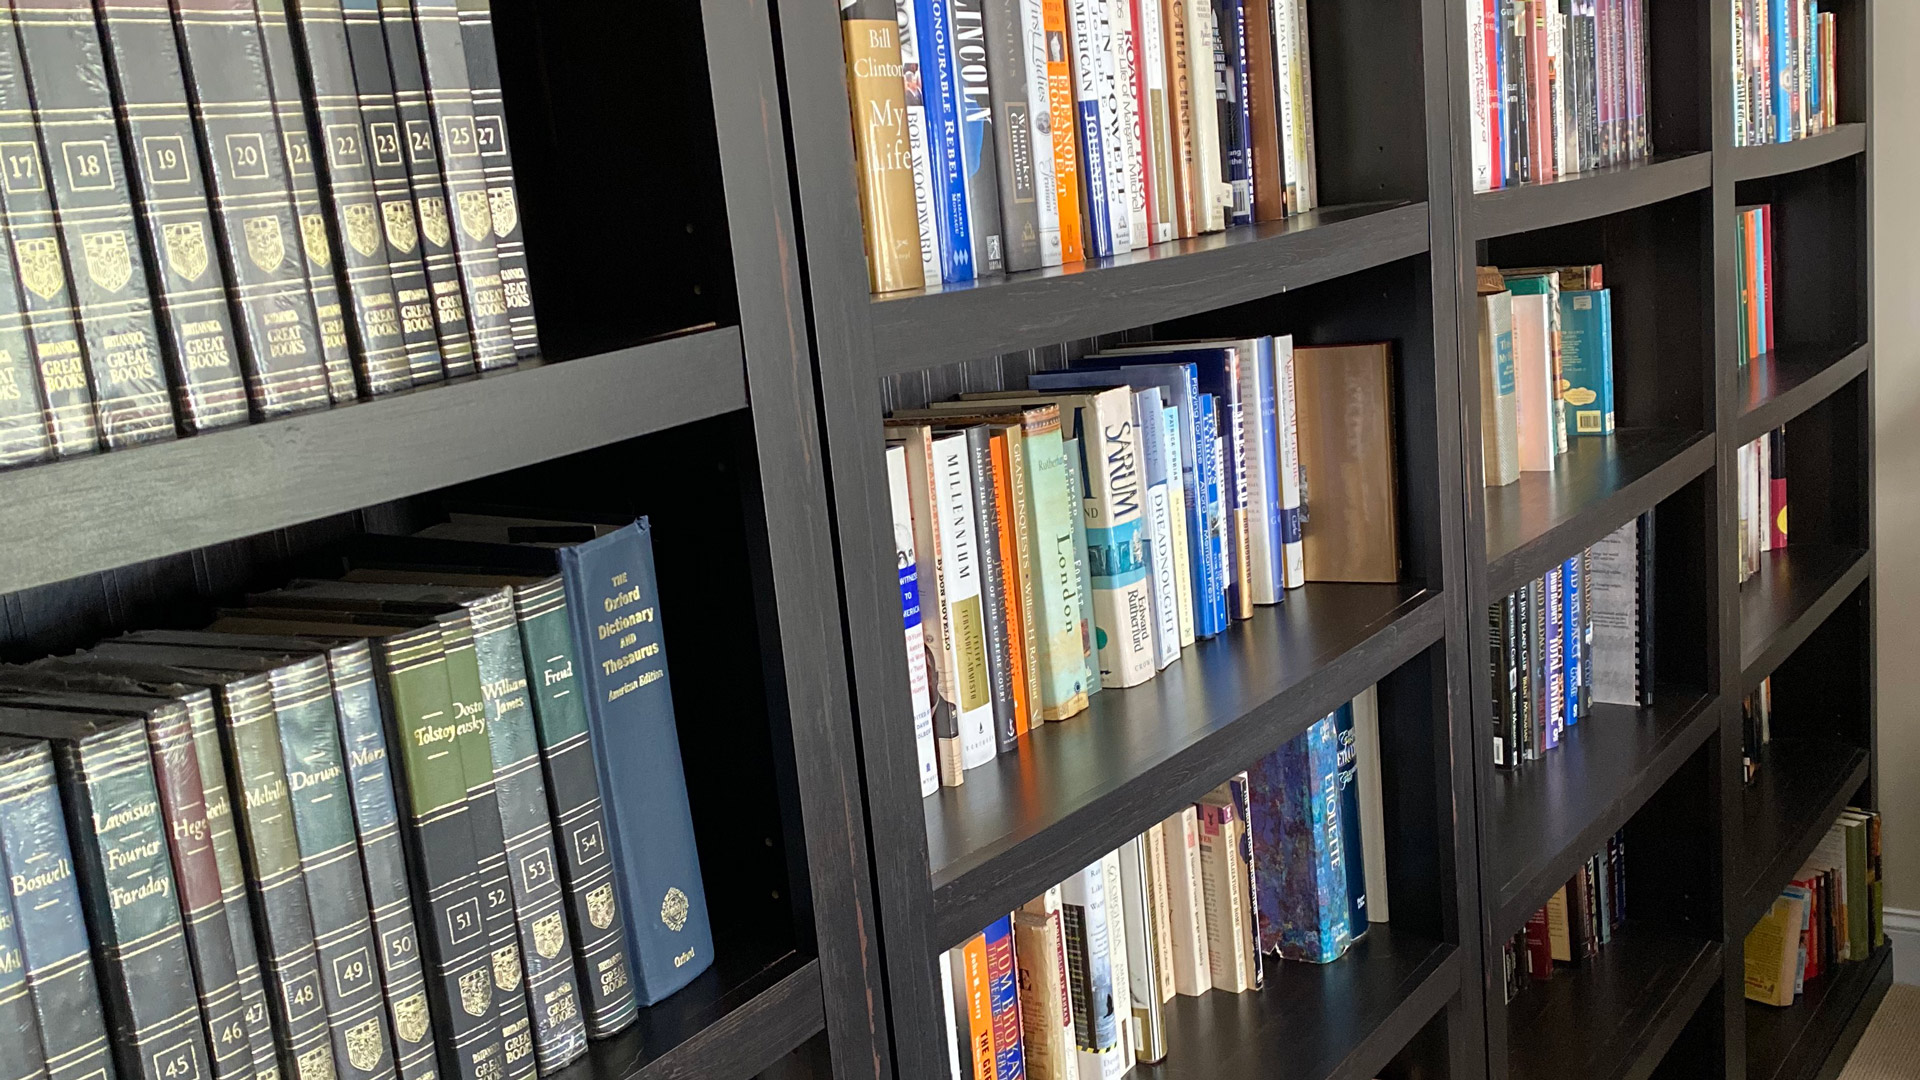
Step #1: The Sort This may need some space so if there is a bed or sofa in the room with the books, it works to make piles on it. This sort sounds simple, but it really takes time. First sort by like to like. You may have some of these categories: How-to, Religion, Cooking, Classics, Language, Travel, Women’s Studies, Art, Children’s, Business, etc. Fiction may be broken down by author. Non-fiction may be broken down into biography, history, current event, American, English, etc. If you can just arrange the shelves, that makes it much easier…but be prepared that you may have to empty the shelves to get your piles.
Step #2: Decision Time Most likely you have more books than space. So once you have sorted, then you next need to decide what to keep. If books are chewed on by the dog or (heaven forbid) are mildewed…. they should be tossed. You may have a relative or friend that reads a favorite author and those can go into a box for him/her. Your space will dictate how much you can keep. The next decision is whether to donate some of your books to someone else. Think of it this way: There will be someone who NEEDS them and WILL LOVE them as much as you did! Your local library is probably your best bet. If they don’t want to keep, they will still likely take them for their annual book sale. Other options are used bookstores (not too many of these anymore but google your area) or a donation site such as Habitat for Humanity. Please call your donation location as some will take books and some will not. If you have large coffee table books, you might be able to take them to a consignment shop…but call and check. One other great donation place is senior centers. You will want to check but many have small libraries and look forward to new arrivals especially the latest best sellers and history books. When my parents moved into assisted living at Thrive Frederica, they took their books with them and donated them to Thrive. They were placed on some shelves just down the hall from their room and my stepdad used to like to go down and “arrange” them. I believe that it gave him great personal pleasure that other people would now also enjoy them.
Step #3: Store Okay… once you have pared the books down to a manageable quantity, now it’s time to put them back into the shelves. This can take some time to keep the categories/authors together. Here you work with category first and then go to author (maybe alphabetizing) …. or it could also be arranged by size. It depends on your books and bookshelves. Small paperbacks can be placed 2 deep if you run out of space.
Step #4: Label Time I would recommend labels only in specific situations where it does not affect the aesthetics of the shelves. Basement or kids room bookshelves are great for labeling. The family room or family office…. that would not be so pretty.
RECAP of KrispTips:
Sort by categories first…then later by author or size within category
Donate the books you don’t want…. your library is probably a good option.
Labels might work for kids’ rooms or basements not libraries or dens
For a personal touch, leave out several book recommendations (with your comments) for your guests to enjoy during their stay
Getting Help with Books
If it seems too overwhelming to organize your books…. please reach out to us. If you have some questions, I am happy to help you get your DIY kicked off….at no charge! And if you still need more help, we can discuss if a Krisp Solutions project would work for you. Another option is that during Covid 19 restrictions we can do virtual consulting over Zoom or Facetime. Contact us and let’s see what help or inspiration you need!
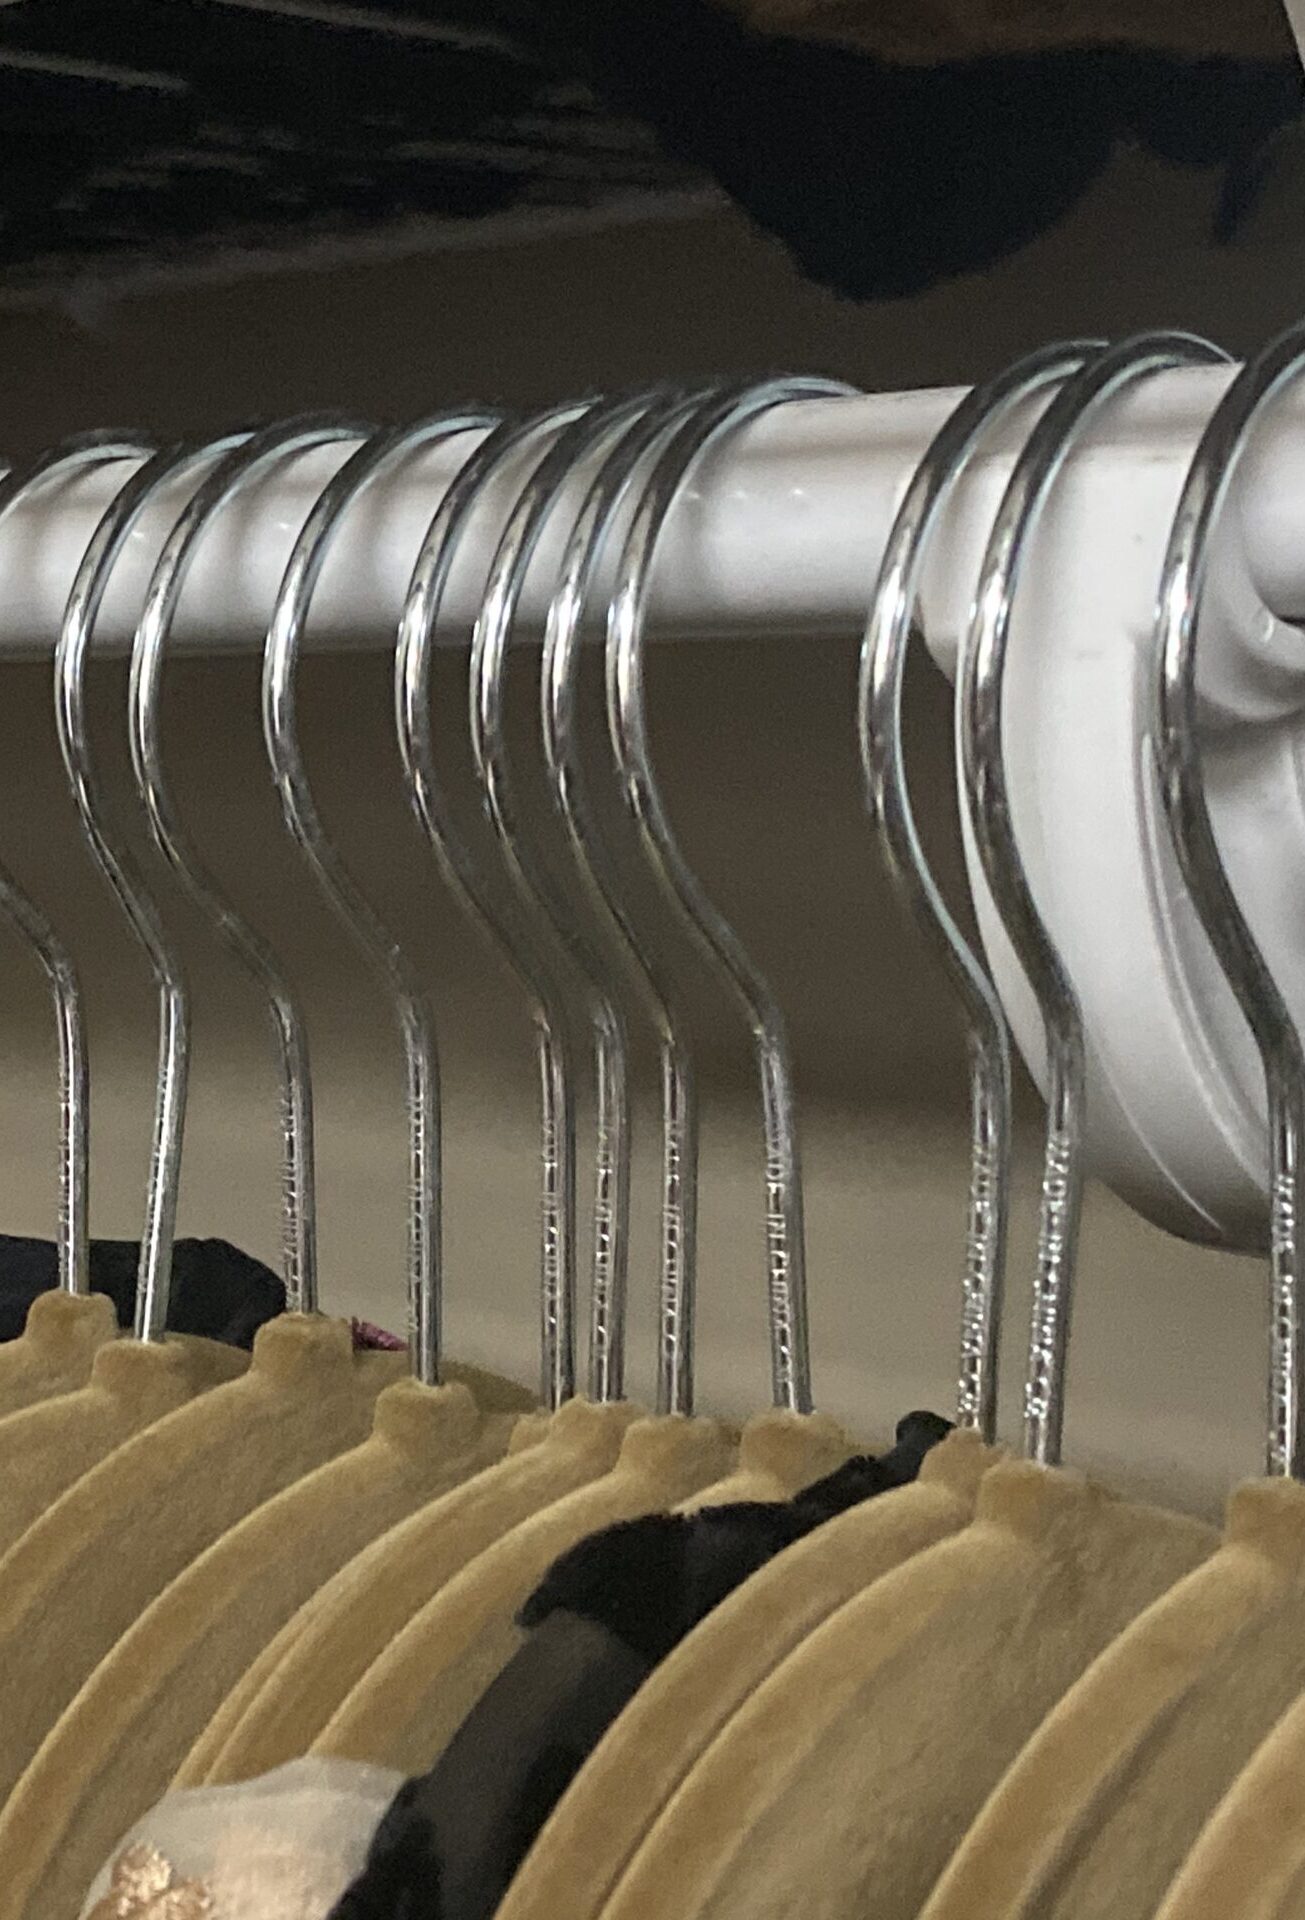
Once a closet is sorted and organized…the perfect touch is to add new hangers THAT MATCH! Such a little thing…but it makes a huge difference in both appearance and practicality. Messy and unmatched hangers that have torn paper, bent and twisted necks, and all different materials-plastic, wood or metal…. just leave the closet looking ragged! I would buy something to match your budget. Joy Mangano used to sell on Amazon nice ones (huggable hangers) in a zillion colors but… they are nearly impossible to get now unless you shop HSN. However, Amazon is my go-to place and they have several very similar other brands that will do. Find a price, color and look that appeals to you. You will need a mix of suit and shirt hangers. I think women in particular love the velvety ones. Items won’t slide off and this is important to avoid the “bump” you can get on stretchy material from the hanger ends. It also creates a very uniform look of everything hanging at the same level.
Closets DIY Process:
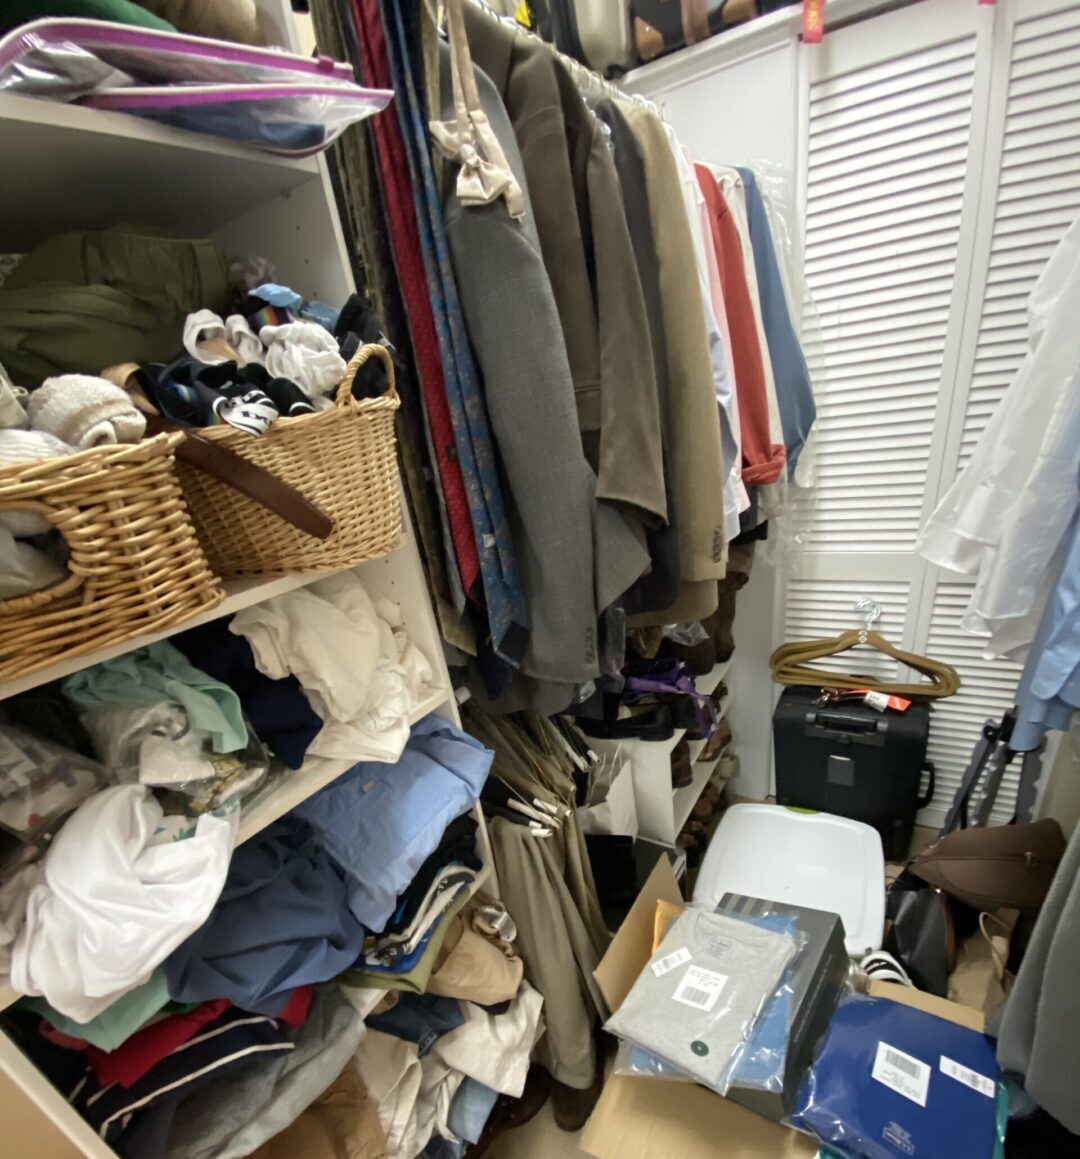
So… before you start to organize your closet I think you need to make some realistic decisions of how you will sort.
I recommend keeping a large bin that can fit on your top shelf. In that bin will go any items that you just can’t let go! Make a decision NOW that if you do not touch them for a year (or two) …they can be donated. But give yourself the time you need to realize that you can let go. If it is a size issue…. I recommend being realistic and keeping only up to two sizes smaller. One size smaller can stay down below if you think you are close and want the inspiration. Or both sizes can go up in the bin. Memorable items like a T-shirt from a favorite concert…. or a bridesmaid dress…are treated the same. If you have not worn it…. you can decide now to let go…or put it in the bin. Remember this bin is not bottomless. You will have to be practical!
This is the hardest part of the closet organization, but once the ground rules are laid…it gets much easier.
To organize your closet, it’s my same organization process:
Step #1: The Sort
For the sort….it helps to move things out of the closet. I would suggest that you make piles on your bed. Important note: do not stop to try anything on now! You will never get through the process! Your first piles should be easy and not require too much thought.
“Toss” is going to be stained, torn and ragged items.
“Good stuff can stay in the closet if you want but you need a pile called “Maybe” (i.e need to make sure it fits)”
“Share” is when you know someone (like a sibling or child) that will want things from you…that gets sorted into a pile.
“Donate” means that you know you will never wear it, but it is in good shape and can be recycled to someone else.
Step#2: Decision Time – Going through the “Maybe” pile
Hopefully you are building momentum now and I would suggest that you do NOT let the next part slow you down. Here you are likely going to want to try things on and make decisions. Keep it simple!
“Doesn’t fit now…but still want to keep” is hopefully a small pile (remember no more than 2 sizes variance). These items are for the bin.
“It fits and you are keeping” …yeah! can go back into the closet immediately.
Then once you have sorted the “Maybe” pile, what remains either doesn’t fit…. or is not you anymore (be realistic!!!) ….and these items should be added to the “Donate” pile.
Step #3: Store
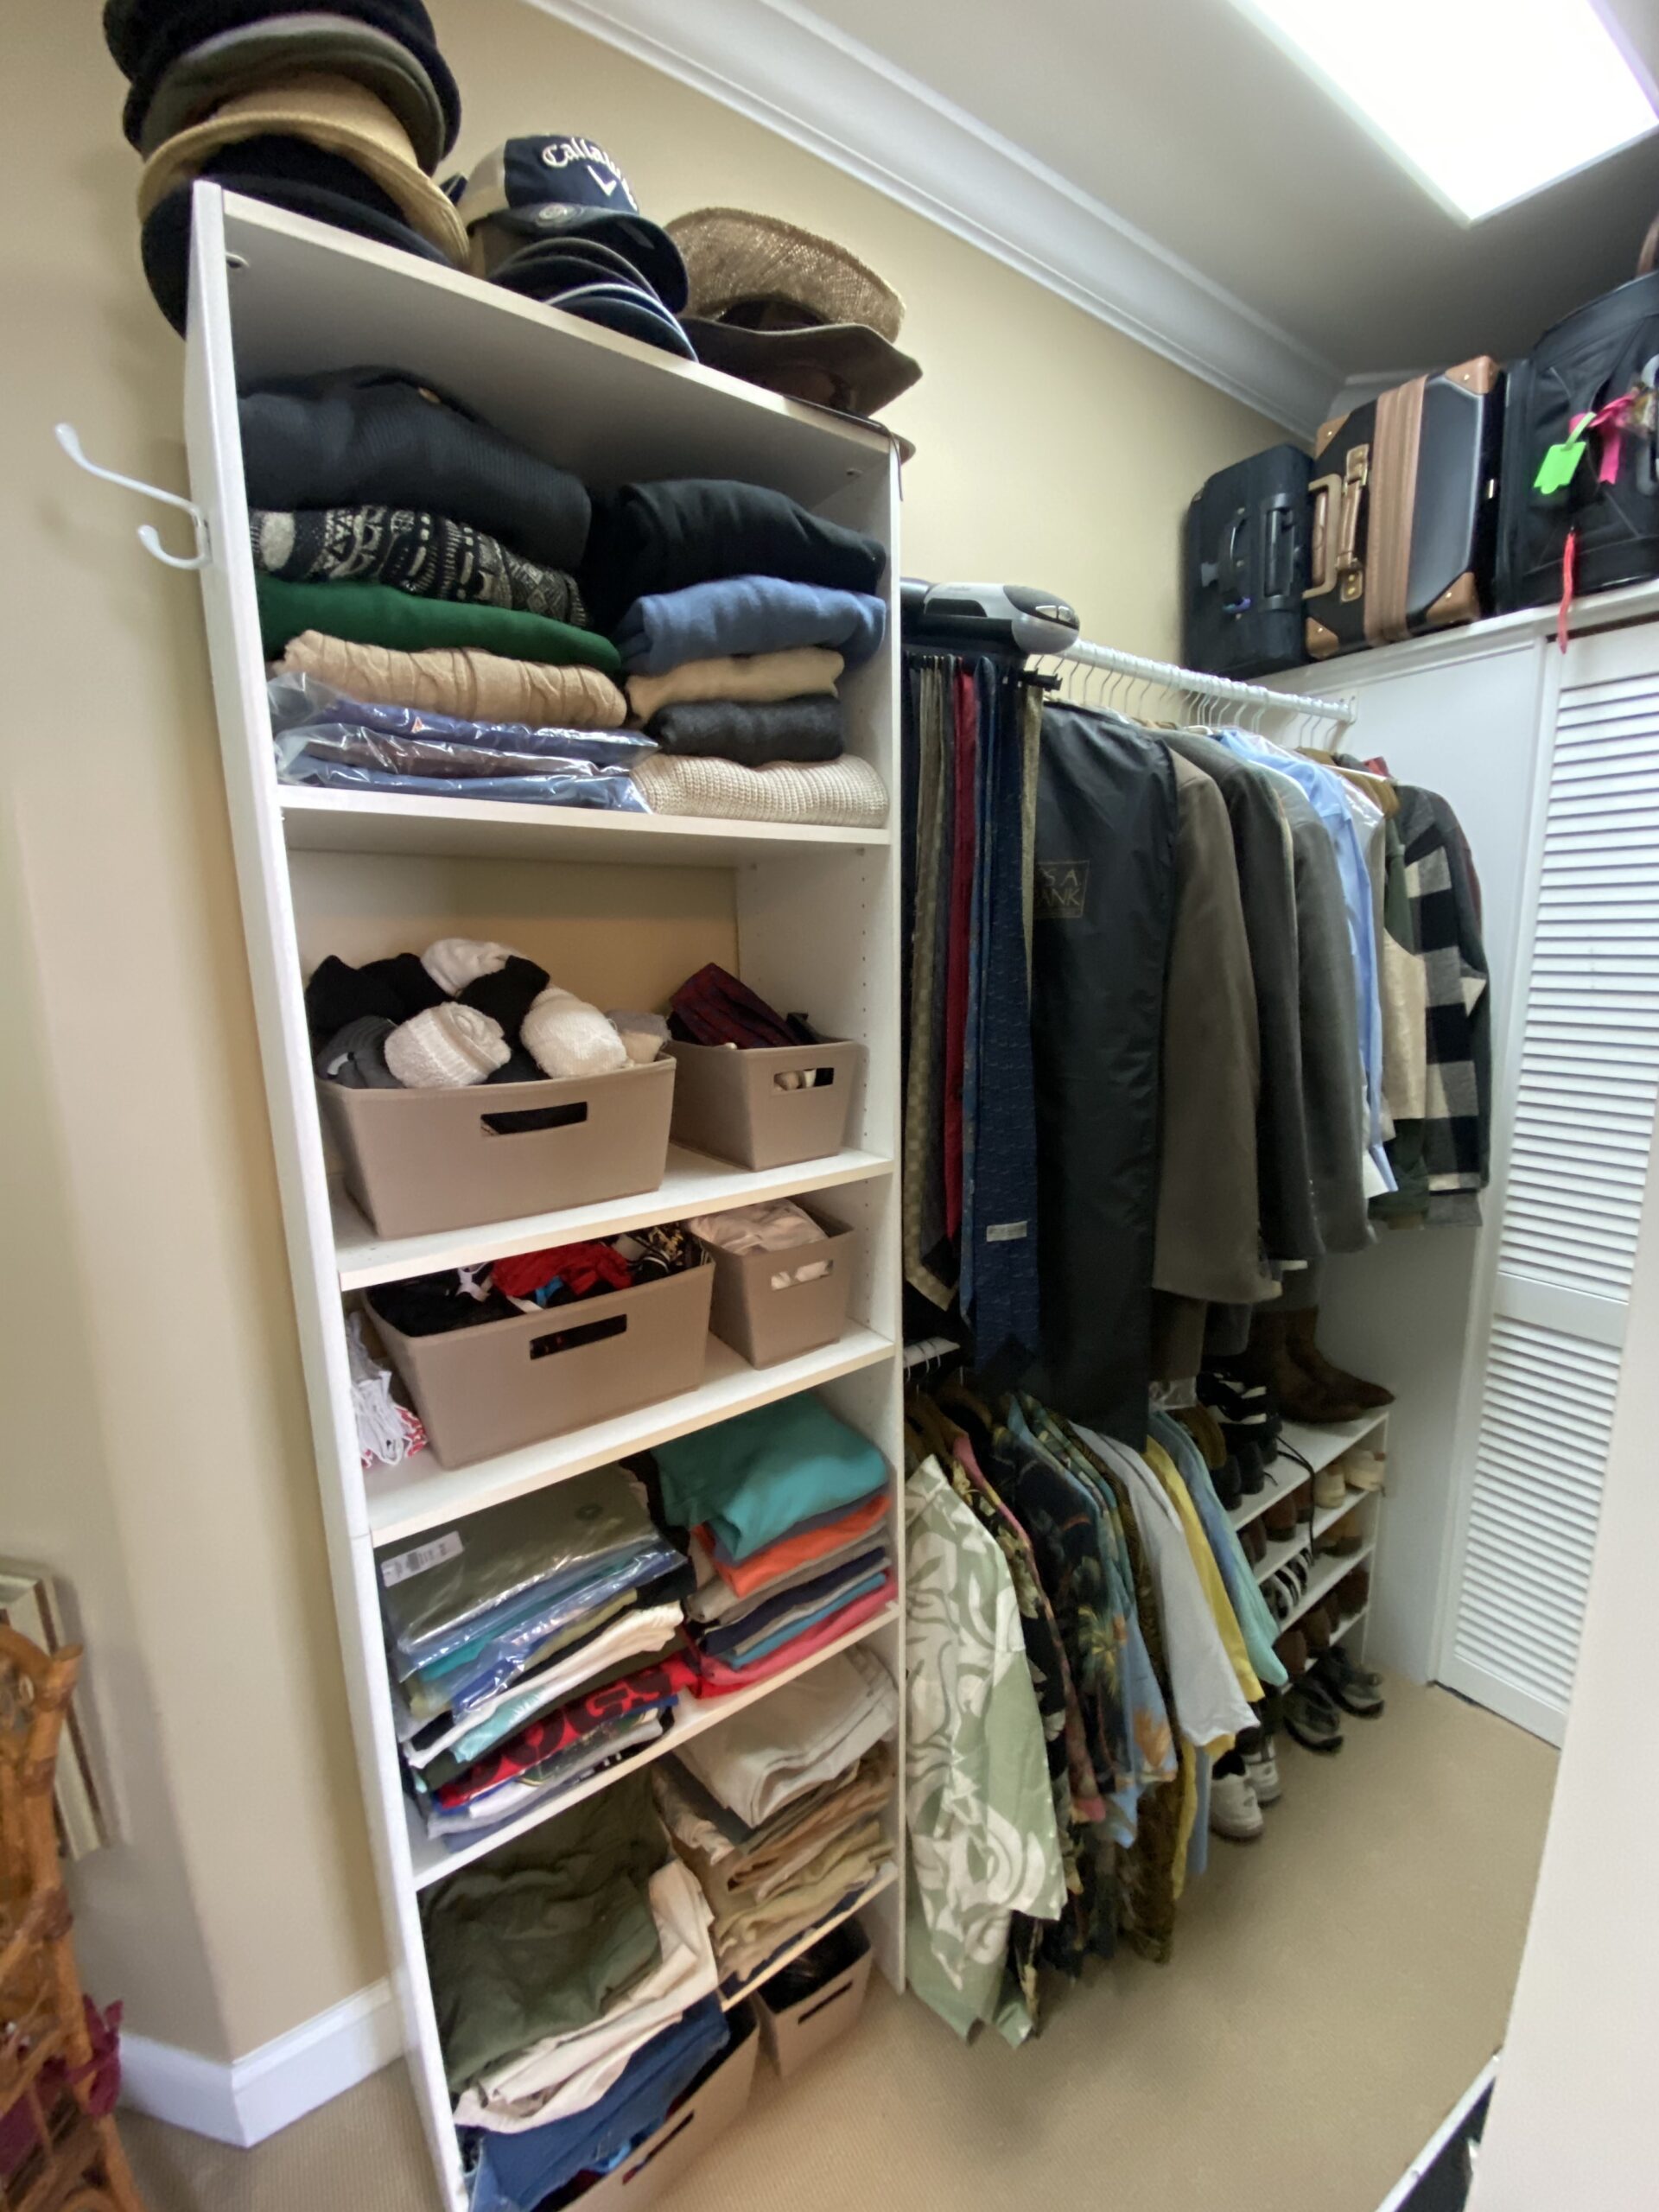
Hopefully you have now opened up some space in your closet. In order to put the remaining items back into it I would get it organized first, then it is easy to add more in. Using your matching hangers, put items like-with-like. Shirts together…and all facing the same way for easy access. Jackets together and all facing the same way. This goes fast now that the sorting is done, and the results are instantaneous. Other groupings might be longer dresses, formal wear, office clothes, winter vs summer, dresses for certain occasions. Men might have groupings like dress shirts, work shirts, long sleeved vs short sleeved, Hawaiian, winter vs summer. All are sorted on matching hangers…like-with-like…and facing the same way. Buttoning shirts makes them more orderly but if you have non-slip hangars it may not be necessary.
Two more things you may want to keep in mind as you organize. Length and color. Since many closets are split top and bottom…you will need to know what fits best where. For women, I always keep the longer skirts and dresses for a tall spot. Color is not essential to group together but can be pleasing…maybe more advanced organizing ;-). An example would be putting all your white (yellow, blue, black, etc.) blouses together. For men it may be all khaki (brown, black, denim) pants. It is very helpful for functional purposes and makes it easy for access. But it also gives a neater look to your closet.
Since shoes are a totally different organization process…. I will do a separate blog later with lots of fun ideas. However, for this closet sort I would go with almost the same rules. If they fit and you wear them, keep them. If they fit but you never wear them, they can go in your stash bin. Shoes are easier to sort because if they don’t fit now, or they are uncomfortable …. then it is unlikely they will ever be wearable. Donate… or if in poor condition…just toss. I recommend that shoes be located on lower shelves or shoe racks. You may want to reserve your higher shelves for bins and/or sweaters.
Belts, ties, purses, and hats may also be occupying your closet space. Grouping them in bins is very nice but they may not get used if out of sight. Showing them off can be both aesthetically pleasing and practical. Belts and ties can go on special hangers that don’t take up space. I always put purses up high and arranged nicely. (Note: designer bags can have a good resale value. If you are keeping a purse just “because”, you might want to consider consignment.)
If you are lucky to have a decent sized closet, you may have room to give the closet some color and style. Hat boxes covered with fabric and ribbon are a lovely addition! (Just make sure you add a nice label or you will never know what is in there.) Matching baskets can add some color and fun. Michaels and Target always have a good selection. I have even used wire ones which allow you to see inside. Nice brightly colored laundry baskets can also work and are budget friendly.
Step #4: Label Time
I would recommend labeling closet shelves only in specific situations as it can affect the aesthetics of the shelves. Labeling bins though would be the great and since they are likely not opened often…the labels will remind you what is in them.
RECAP of KrispTips:
Limit yourself to a large bin(s) (for your top shelf) for things that you don’t want to part with but are currently not wearing (due to size or style). Promise yourself that you will address these items at a later time!
Complete the sort before you try things on! Keep your momentum going!
Donate what doesn’t fit or work for you in your current world. Rather than just stashed in your closet…. there are people out there that will very much appreciate and wear your “gently used” clothing!
Use your shelves for sweaters or purse displays. The very top shelf can be labeled bins.
To make the closet neat and organized, use matching hangers and turn all items the same direction for easy access.
Getting Help with Closets
If it seems too overwhelming to organize your own closet…. please reach out to us. If you have some questions, I am happy to help you get your DIY kicked off….at no charge! And if you still need more help, we can discuss if a Krisp Solutions project would work for you. Another option is that during Covid 19 restrictions we can do virtual consulting over Zoom or Facetime. Contact us and let’s see what help or inspiration you need!